
Description
Switch Video Quality adds a quality switch button to the native wordpress video player (mediaelement.js), that allows to choose between different resolutions (e.g., SD and HD) and/or formats (mp4, webm, ogv) of a self-hosted html5-compatible video. Additionally it provides an iframe embed code to let your viewers embed your video into their website (optional).
Features:
- serve your videos in multiple qualities to let your viewers choose (just like youtube or vimeo)
- upload your video files directly to the wordpress media library or use a separate web server to host your files (direct URLs have to be entered manually)
- create a playlist when you have more than one video on a page (only one player needed). The playlist is placed below the player as a grid layout with thumbnails for each video
- provide an automatically generated iframe embed code for each video
- use subtitles for multiple languages
- reorder playlist items with drag and drop
- quality level labels show the videos height value by default, but you can set custom ones easily
- HD and 4K quality flags are added to the labels automatically
- optionally show an info overlay in the player that contains title and duration information
- turn on/off on a per-post basis
- fully translatable (english and german language files already included)
How to use:
- In the post editor, use the normal video shortcode (width and height set to your needs) to place the video player in your content area, like this:
- There are no other shortcode attributes necessary (actually even width and height arent necessary as they default to 640 x 480 px when they are omitted), but you may add a src and a poster attribute to ensure normal shortcode functionality when Switch Video Quality is not used or deactivated.
- Select the checkbox Turn on/off to activate the plugin for the current post.
- In the playlist item box enter some information about your video such as titles, names, locations, dates or an external link. This information will be displayed in the playlist and in the information overlay of the video player.
- Upload a poster image or select one from the media library
- Upload your videos with different resolutions and/or different formats (mp4, webm or ogv).
- You can select multiple video files in the media library and add them to the current playlist item all at once.
- The order of the files (quality levels) doesnt matter as they will be sorted by their height value when theyre loaded into the player. The quality level that is closest to (but to avoid upscaling not smaller than) the players size will be loaded as default.
- All video details (URL, label, duration) are inserted automatically, but you can change the default label text to whatever you like (e.g., low, medium, high)
- If your video files are hosted on an external server, enter the URLs manually (the plugin will try to fill out the other fields automatically)
- To add another playlist item, click on the plus icon at the top of the current playlist item box
- To change the order of the playlist items, click on the playlist position number and drag and drop the box below or above another one.
- When you click on the title of the box, this box gets expanded (content is shown) and all others will be collapsed. You can collapse all boxes by clicking on the title of an open one (makes rearranging of the boxes easier).
- Empty a playlist item box by clicking on the rubber icon, remove the whole box completely by clicking on the X icon (not possible when there is only one box left)
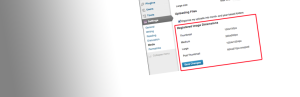
Screenshots


Installation
- Upload the unzipped folder
switch-video-qualityto the/wp-content/plugins/directory. - Activate the plugin through the Plugins menu in WordPress.
- It all happens in the post editing screen. Switch Video Quality has no global settings (but there are some filter hooks available to make global settings).
FAQ
-
Normal users: Ask your server administrator to increase the max filesize limit.
Admins: Edit the php.ini file and change the values of upload_max_filesize, post_max_size and memory_limit. -
Maybe your webserver doesnt support pseudo streaming over http. Ask your server administrator to install the missing module. Also make sure your video files are encoded properly. MP4s must have the MOOV Atom placed at the beginning of the file.
-
At page load the plugin checks the types of html5 video your browser can play and then only the first supported file format is used.
-
No, sorry, the plugin is meant to be used with only one player instance per post/page. But you can have multiple posts (each with Switch Video Quality activated) displayed on a page, e.g., if you query by a certain category or tag.
-
Theres a filter hook for doing that. Copy the following code into your functions.php and change the content of the
$to_be_excludedarray with the registered names of the post types you want to exclude:add_filter('svq_exclude_post_types', 'custom_svq_exclude_post_types'); function custom_svq_exclude_post_types($excluded){ $to_be_excluded = array('post_type_name', 'another_post_type_name'); $excluded = array_merge($excluded, $to_be_excluded); return $excluded; }If you dont know the registered name of a custom post type: its shown in your browsers adress bar when you look at the post types managing screen (after
edit.php?post_type=). -
Use the filter hook svq_default_quality. Copy the following code into your functions.php and change the return value to whatever (unitless video height) you like:
add_filter('svq_default_quality', 'set_svq_default_quality'); function set_svq_default_quality(){ return 720; }Your videos dont need to exactly match the defined quality. The one with the quality closest to (but not smaller than) the defined quality will be set as default.
-
Use the filter hook svq_embed_setting_overwrite. Copy the following code into your functions.php and change the post IDs of the $not_active array to enable the embed functionality for all posts except the ones with the IDs you specified. You can easily modify this code to disable embedding for all posts or enable it for all posts that are in a certain category.
add_filter( 'svq_embed_setting_overwrite', 'overwrite_svq_embed_setting', 10, 2); function overwrite_svq_embed_setting($setting, $post_id) { $not_active = array(32, 42); if ( !in_array($post_id, $not_active) ){ $setting = true; } return $setting; } -
You can use the filter hook svq_embed_page_name. Copy the following code into your functions.php and replace the page name in the return statement.
add_filter( 'svq_embed_page_name', 'my_svq_embed_page_name'); function my_svq_embed_page_name(){ return 'embeds'; }Note that the default template used for generating the iframe content wont output the post content or any metadata of a specified page. If you want to add any code to the iframe, youll need to write a custom template (see another question). But if you just want a certain page name to be a part of your embed codes, you can leave that page blank and use the default template.
-
For everything to work properly copy the content of the plugins embed template and modify or add only what you need. Save it as svq_embeds.php (mandatory) and upload it to your theme or child-theme directory and the plugin will automatically use it.
If you want to put it somewhere else, use the filter hook svq_locate_template. Copy the following code into your functions.php and change the path to the template:add_filter('svq_locate_template', 'svq_locate_custom_template'); function svq_locate_custom_template(){ return YOURCUSTOMPATH . '/svq_embeds.php'; }


